How to test an AI blog writer before you buy it

Last updated: October 22, 2026
Quick Answer: One real brief, one brand voice sample, and one revision request will tell you more than any polished demo. In practice, the how to test an AI blog writer before you buy it question is best answered with your own material, not a toy prompt.
Key Takeaways
- Use a real assignment, not a toy prompt.
- Test the full path from brief to draft to final polish.
- Brand voice is often where AI blog writers fall short.
- A clean draft still may not be usable.
Start with the one article you actually need written
A real assignment is the best test. Skip the toy prompt. Pick one article you could publish if the draft held up: a 1,200- to 1,800-word piece, a service page turned into an article, or a comparison piece with a clear angle. That gives you enough room to see whether the AI blog writer can handle headings, transitions, examples, and a clean ending.
Before you open the trial account, gather four things:
- one target keyword or topic
- one existing article that matches your brand voice
- one short brand style note, even if it is only 5 bullets
- one decision about what “good enough” means for first draft quality
That last point matters more than people admit. A tool that produces a rough draft in 10 minutes may still fail if it takes 90 minutes to repair the tone; the clock can lie to you. The trial should show output quality and editing burden, not just speed.
Choose the sample article poorly, and you can misread the tool. A very simple list article can make a weak writer look strong. A technical topic with product details can make a decent writer look useless. The right test is a normal article from your content calendar, not the easiest one you can imagine.
What should i test in an AI blog writer trial?
Test the full path from prompt to draft to final polish, not just whether the tool can generate text. A useful trial account shows how the AI handles structure, accuracy, voice, and revision in one session, because that is how the tool will behave on real work.
Use one prompt that includes the article goal, audience, angle, and any brand constraints. For example, your prompt can name the topic, the desired length, the tone, the primary takeaway, and phrases to avoid. Then watch what happens when you add detail. A strong AI blog writer should improve when the prompt gets clearer, not collapse into generic filler.
A practical trial should include these checks:
- Give it a real brief. Paste a prompt with topic, audience, goal, and length, such as 1,500 words. The result should follow the assignment instead of inventing its own topic.
- Ask for a draft with headings. The outline should create logical sections, not four vague H2s that repeat the title.
- Add your brand voice note. If your brand voice is direct, skeptical, or technical, the draft should reflect that after one pass.
- Check the opening paragraph. The first 100 to 150 words should say what the article is about without warm-up text.
- Review one factual section. If the tool names features, standards, dates, or definitions, those claims should be clean and specific.
- Ask for one revision. A useful writer improves after correction instead of merely shuffling sentences.
- Measure the cleanup time. If you spend 20 minutes fixing each 500-word chunk, the tool is expensive even if the trial looks impressive.
What you want to see is not perfection. You want a draft that keeps its shape after one edit cycle. Should the tool need heavily padded instructions just to write passable text, that is a warning sign. It means your team will carry the prompt burden every time.
Run a brand voice test the tool cannot fake
The brand voice test is where many AI blog writers fail, even when the prose looks polished. They sound fluent but generic. That is a problem if your site depends on a consistent voice, because the draft will feel machine-made even after cleanup.
Use a short, specific brand voice sample. One paragraph from a strong existing article is better than a 2-page style guide nobody reads. If the tool lets you upload examples, use one article in the tone you want and one that is slightly off-brand. The draft should move toward the first and away from the second.
Then check for three things:
- sentence shape
- vocabulary discipline
- stance
Sentence shape matters because brand voice is often rhythm as much as word choice. A confident brand may use shorter sentences and direct verbs. A more educational brand may use longer, explanatory lines. The tool should not flatten everything into the same middle tempo.
Vocabulary discipline matters because many drafts rely on empty marketing language. Watch for words like “robust,” “seamless,” and “game-changer.” If those show up in a trial draft, the writer still needs a lot of restraint training.
Stance matters because good content has a point of view. A brand voice sample should help the AI choose what to emphasize and what to ignore. When the draft explains everything and says nothing, it will be hard to trust in a live editorial calendar.
The easiest way to judge this is side by side. Put the trial draft next to a published article from your site and read the first 3 paragraphs aloud. If the two pieces feel like they came from different teams, the tool has not passed the voice test.
Check the draft for editing burden, not just grammar
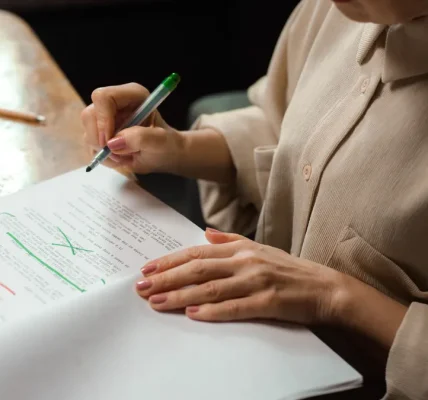
A clean draft is not the same thing as a usable draft. The real test is how much editing the article needs before it can ship. A tool that produces grammatically correct but structurally weak text still costs you time, because a human has to rebuild the piece.
Mark the draft in four passes:
- Structure: Do the headings move in a useful order, or do they repeat the same point in different words?
- Logic: Does each paragraph add something new, or does it restate the previous one?
- Specificity: Does the draft use concrete nouns, examples, and numbers where needed?
- Brand fit: Does it sound like your site, or like an average web article?
A good trial draft should reduce editing, not just copyediting. If your only fixes are commas and one awkward phrase, that is a good sign. If you have to reorder sections, add missing context, remove fluff, and rewrite the opening, the editing burden is too high.
This is where a lot of buyers get fooled. A polished surface can hide a weak core. Some tools produce paragraphs that look finished because the sentences are smooth. Then you notice that the article never says anything definite. That is not a writing tool doing its job; that is a sentence generator creating more work for your editor.
A useful benchmark is the “ready in one pass” question. After one prompt and one revision, would you hand the draft to an editor, or would you rebuild it first? Should the answer be rebuild, the tool has not earned a purchase.
How do i know if an AI blog writer is worth paying for?
An AI blog writer is worth paying for when it saves more editing time than it creates. The best sign is that your team can move from prompt to publishable draft with fewer rewrites, tighter brand control, and less friction in the approval process.
Use a simple comparison during the trial. Take one article you normally write or commission. Run it through the tool and compare the draft against your normal workflow. You are not looking for a perfect substitute for a human writer. You are looking for a tool that shortens the path from brief to publishable copy.
Three signs point to value:
- The outline is usable. It gives you a structure you would not need to rebuild from scratch.
- The first draft is close. You can edit it, not rescue it.
- The revisions are stable. When you ask for changes, the tool keeps the article coherent.
Three signs point the other way:
- The draft is vague. It sounds like it could fit any topic.
- The tool ignores instructions. It keeps missing tone, length, or angle.
- The clean-up takes too long. If the draft saves 10 minutes but costs 40, the math is bad.
This is the point where buyers often overvalue novelty and undervalue process. A trial that feels impressive for 5 minutes can still be a poor purchase if it does not fit your publishing workflow. Should your team need 3 rounds of editorial correction to fix one article, you have not bought speed; you have bought another review task.
Test for accuracy and source discipline before you trust it
Accuracy is the hardest part to recover after the fact, so this test should happen before you buy anything. The draft should not invent facts, blur definitions, or present weakly supported claims as if they were settled truth.
Use a topic that includes at least one factual claim the model has to handle carefully. That could be a dated process, a product comparison, a definition with a standard term, or a workflow with numbered steps. Then check whether the draft keeps facts separate from interpretation.
Pay close attention to these failure modes:
- it states specifics without grounding
- it mixes examples with claims
- it makes unsupported comparisons
- it sounds certain where the source material is not certain
If the tool can cite or link sources, inspect those closely. A source list is only useful if the sources are relevant and real. A model that drops in references without using them well still needs manual fact-checking.
This is especially important if your content team publishes under editorial standards. The trial draft should make fact-checking easier, not harder. Should you have to verify nearly every paragraph, the draft may look efficient but still fail your standard.
One practical rule helps here: if a sentence would require a fact checker in your normal process, the AI blog writer should not be allowed to state it casually in a first draft. It should either flag the uncertainty or leave the slot open for human review.
Run one revision loop and see if the tool learns
A single draft tells you very little. The revision loop tells you whether the AI blog writer is manageable. Ask for one targeted change, then watch whether it follows the correction without damaging the rest of the article.
Good revision tests are narrow. Try requests like these:
- “Make the tone more direct.”
- “Remove all promotional language.”
- “Rewrite the introduction for a beginner audience.”
- “Keep the heading structure, but tighten the body by 15%.”
- “Change this draft to match the brand voice sample.”
What you want is controlled change. The updated draft should improve the specific problem you named without breaking the sections that already worked. Should it overcorrect, lose key points, or start repeating itself, the tool is not stable enough for production use.
This step matters because many teams buy the first version of a tool, then discover the revision process is clumsy. They can generate content, but they cannot shape it efficiently. That is a workflow problem, not a style problem.
A strong trial ends with a clear yes or no: can this tool produce a good-enough draft, accept direction, and keep the article coherent after revision? If the answer is yes, you have something worth paying for. If the answer is no, no number of extra templates will fix it.
Common mistakes that make the trial lie to you
The most common mistake is testing the AI blog writer on a vague prompt. That produces vague output, then the buyer blames the tool for a bad brief. A weak prompt hides whether the writer can actually follow instructions. The fix is a real article brief with a defined audience, length, and angle.
The second mistake is judging the draft by excitement instead of labor. A flashy opening can distract from the fact that the body is thin. That costs you time later, because editorial cleanup becomes the hidden price of the purchase. The fix is to measure how many sections you keep, cut, or rewrite.
The third mistake is skipping the brand voice test. That costs consistency across your site, which is harder to repair than one awkward article. The fix is to use a published sample and compare the trial draft against it line by line.
The fourth mistake is assuming a trial account proves production value. It often does not. Trial settings are sometimes more generous than real usage, and a clean sandbox can hide workflow friction. The fix is to test the exact kind of prompt, draft length, and revision loop your team will use after purchase.
The fifth mistake is ignoring the editing burden. When the draft looks good but takes a full editorial pass, the tool may still be too slow for your team. The fix is simple: time the cleanup, not just the generation.
What should i look for in a sample draft?
A good sample draft should have a clear opening, logical headings, and enough specificity that it feels ready for editing rather than rebuilding. It should also match your brand voice without sounding forced. If the draft is generic, repetitive, or overloaded with filler, that is a warning sign even if the grammar is clean.
How do i know if an AI blog writer is worth paying for?
An AI blog writer is worth paying for if it reduces the time between brief and publishable article. The draft should follow instructions, stay close to your voice, and need less structural repair than a rough human draft. When the tool only saves typing time but adds heavy editorial work, it is not earning its keep.
What should i test in an AI blog writer trial?
You should test one real article brief, one brand voice sample, one revision request, and one accuracy check. That combination shows whether the tool can handle the work you will actually assign. When the output only looks good in a shallow demo, the trial has not answered the buying question.
Drafted with AI; not yet reviewed by a person.